
Commercial Invoice Template
A commercial invoice is the key customs document for goods crossing a border. This template pack gives you an Excel commercial invoice that totals values and weights automatically, a Word version, a pro forma invoice for samples and quotes, a packing list and a guide to every field customs officers look for.
- Instant download
- Editable Excel & Word
- Print-ready PDF
- 7-day refund
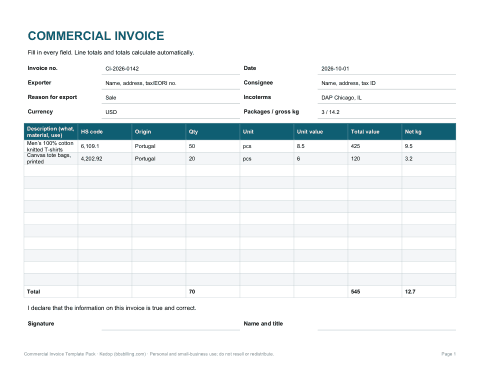
5 files · XLSX, PDF, DOCX
Commercial Invoice Template Pack
Excel and Word commercial invoice with automatic totals, pro forma invoice, packing list and a customs field guide.
- Commercial invoice (XLSX, PDF)
- Commercial invoice (DOCX)
- Pro forma invoice (DOCX, PDF)
- + 2 more
$7.00 USD, one-time 5 files · about $1.40 each
- Instant download
- 7-day refund
- Secure checkout by Stripe
7-day money-back guarantee. Full refund within 7 days of purchase, even after you download.
Free sample: Commercial Invoice (PDF, 53 KB)
Commercial Invoice Template Pack
Excel and Word commercial invoice with automatic totals, pro forma invoice, packing list and a customs field guide.
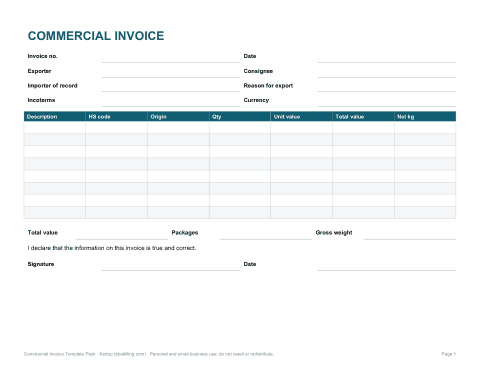
- Commercial invoice (XLSX, PDF)
- Commercial invoice (DOCX)
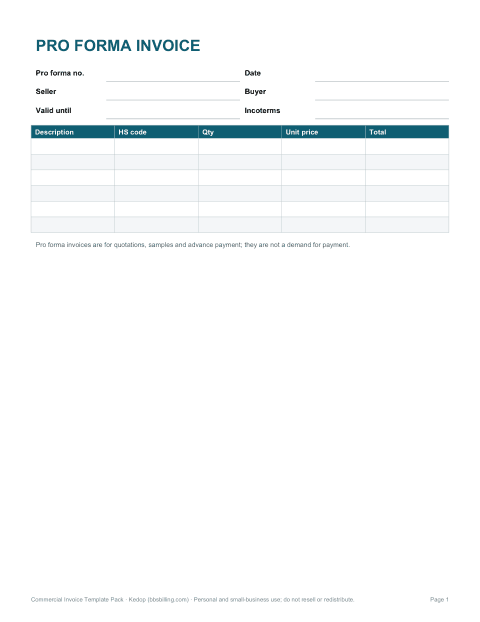
- Pro forma invoice (DOCX, PDF)
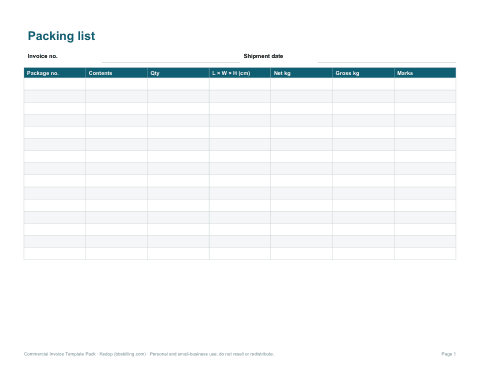
- Packing list (XLSX, PDF)
- Field guide (PDF)
Formats: XLSX, PDF, DOCX. Instant download after payment (link valid 72 hours, up to 5 downloads). AI-assisted: the templates were drafted with AI help and reviewed and laid out before publishing.
$7.00 USD, one-time 5 files · about $1.40 each
- Instant download
- 7-day refund
- Secure checkout by Stripe
7-day money-back guarantee. Full refund within 7 days of purchase, even after you download.
Free sample: Commercial Invoice (PDF, 53 KB)
Full refund within 7 days — see the refund policy and license.
Free printables
Single sheets you can print right now, no sign-up. The full pack adds every sheet in one download plus the editable files.
 Printable Commercial Invoice Template
 Pro Forma Invoice Template
 Printable Packing List Template
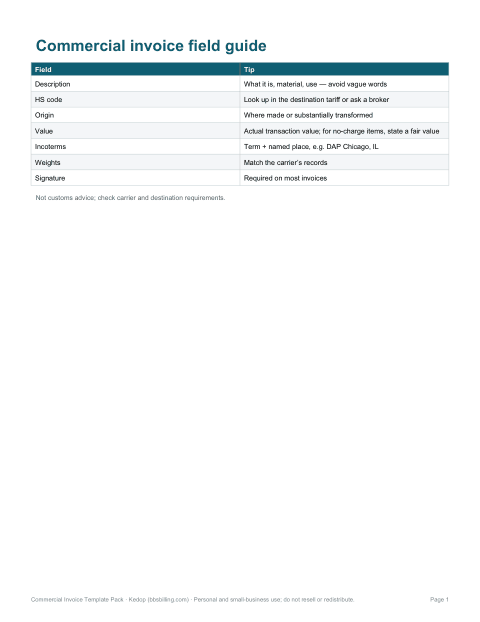
 Printable Commercial Invoice Field Guide
What a commercial invoice is for
A commercial invoice is issued by the exporter (seller or shipper) and travels with an international shipment. Customs authorities in the destination country use it to identify the goods, check they are allowed in, calculate duties and taxes, and compile trade statistics. Carriers and freight forwarders also need it to book and clear the shipment. It differs from a regular sales invoice in the level of detail about the goods — descriptions, tariff codes, origin and weights — and the parties involved.
Fields on a commercial invoice
| Field | What to enter |
|---|---|
| Exporter / shipper | Name, address, phone, tax or EORI number where applicable |
| Consignee | The recipient of the goods, with full address and tax ID if required |
| Buyer / importer of record | If different from the consignee |
| Invoice number and date | Your unique reference |
| Reason for export | Sale, sample, gift, repair, return, etc. |
| Incoterms | Who pays freight, insurance and duties (e.g. EXW, FOB, CIF, DAP, DDP) |
| Line items | Detailed description, HS code, country of origin, quantity, unit value, total value |
| Currency | The currency of the transaction |
| Weights and packages | Net and gross weight, number of packages |
| Declaration and signature | A statement that the information is true and correct |
Writing good descriptions
Customs officers need to understand exactly what each item is. “Clothing” or “parts” will cause delays; “Men’s 100% cotton knitted T-shirts” or “Stainless steel hex bolts M8 × 40 mm” will not. Describe what the item is, what it is made of and what it is used for. Group identical items on one line with a quantity; list different items separately. Include model numbers where relevant.
HS codes and country of origin
The Harmonized System (HS) is an international nomenclature maintained by the World Customs Organization that classifies traded goods with a six-digit code; countries add further digits for their own tariffs (for example, 10-digit HTS codes in the United States). The correct code determines the duty rate, so look it up in the destination country’s tariff database or ask your customs broker. Country of origin is where the goods were made or substantially transformed — not necessarily where they ship from — and it affects duties and trade agreement eligibility.
Incoterms in brief
| Term | Seller’s responsibility |
|---|---|
| EXW (Ex Works) | Makes goods available at the seller’s premises; buyer handles almost everything |
| FCA (Free Carrier) | Delivers goods, cleared for export, to the buyer’s carrier |
| FOB (Free On Board) | Loads goods on the vessel at the named port (sea freight) |
| CIF (Cost, Insurance and Freight) | Pays freight and minimum insurance to the destination port |
| DAP (Delivered at Place) | Delivers to the named place, unloaded by the buyer; buyer pays import duties |
| DDP (Delivered Duty Paid) | Delivers to the buyer with import duties and taxes paid by the seller |
Incoterms rules are published by the International Chamber of Commerce; the current edition is Incoterms 2020. Write the term followed by the named place, such as “DAP Chicago, IL”.
What is in the template pack
- Excel commercial invoice — line totals, invoice total, total quantity and weights calculate automatically.
- Word commercial invoice — the same layout for typing or printing.
- Pro forma invoice — for quotes, samples and shipments with no sale.
- Packing list — package-by-package contents, dimensions and weights.
- Field guide — what each field means, with common mistakes to avoid.
Common mistakes that delay shipments
- Vague descriptions such as “gift”, “samples” or “parts”.
- Declared values that do not match the sale price or are artificially low.
- Missing or wrong HS codes and country of origin.
- Weights that do not match the carrier’s records.
- Missing Incoterms, currency or signature.
- Inconsistent details between the invoice, packing list and shipping label.
Who it is for
Small exporters, online sellers shipping abroad, manufacturers sending samples, and anyone preparing documents for a courier, postal service or freight forwarder. Carriers and postal services may also require their own customs forms or electronic data; check your carrier’s requirements and use this template alongside them.
Formats
Excel (XLSX) with formulas and a PDF copy, plus editable Word (DOCX) versions of the invoice, pro forma and packing list.
Frequently asked questions
What is a commercial invoice?
A document from the exporter describing goods, values and parties for customs clearance in international shipping.
Do I need a commercial invoice for a gift?
Most carriers require one (or a customs declaration) for any international goods; mark the reason for export as gift.
What is an HS code?
A six-digit international product classification code used by customs to set duties.
Is a pro forma invoice the same?
No. A pro forma is a preliminary invoice for quotes or samples; the commercial invoice records the actual transaction.
Was AI used to create the templates?
The templates were drafted with AI assistance and then reviewed, edited and formatted before publishing. They are not customs or legal advice.